PHPMotionのインストールを随分前に書きましたが、2010年からバージョンのアップデートもなく、実際のYouTubeと大分変わってきているので、他のYouTubeクローンをインストールしてみよう。ということで、ViMPをインストールしてみます。
ViMPのサーバー要件:http://www.vimp.com/en/documentation-faq-article/items/what-are-the-technical-requirements-for-vimp.html
WHAT ARE THE TECHNICAL REQUIREMENTS FOR VIMP?
- You need a dedicated server with root permissions to install ViMP (we advise against using a virtual server, as performance data of providers are always to be considered as relative figures).
- We recommend Linux as OS.
An installation under UNIX, BSD or Windows is possible, but not officially supported.The following software is required to run ViMP:
Apache2:
- Version 2.2 recommended
- mod_rewrite must be enabled
PHP:
- Version 5.2.7+, 5.3.x
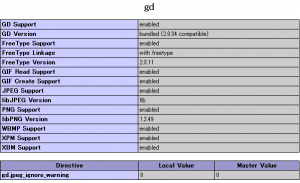
- GD library, MySQL and XSL extensions must be installed
- PHP CLI (Command Line Interface) must be installed
MySQL:
- At least version 5.0
- InnoDB must be installed
Transcoding: The transcoding tools should be installed exactly as described in the documentation. Due to patent protections it’s not sufficient to install the default packages.
- mencoder / MPlayer 1.0RC2
- ffmpeg
- additional codecs
- Ruby and flvtool2
毎度のことながらこれだけの要件を満たすには自宅サーバーが必要だと思います。
ということで自宅サーバーにインストール。
インストールするサーバー:
OS:CentOS 6.3(Final)(KVMゲスト・Mem 8G・CPUconfig Core2Duox2)
[root@www ~]# uname -a Linux www.public 2.6.32-279.9.1.el6.x86_64 #1 SMP Tue Sep 25 21:43:11 UTC 2012 x86_64 x86_64 x86_64 GNU/Linux
[root@www ~]# httpd -v
Server version: Apache/2.2.15 (Unix)
Server built: Feb 13 2012 22:31:42
[root@www ~]# php -v PHP 5.3.3 (cli) (built: Jul 3 2012 16:53:21)
Copyright (c) 1997-2010 The PHP Group
Zend Engine v2.3.0, Copyright (c) 1998-2010 Zend Technologies
[root@www ~]# ruby --version
ruby 1.8.7 (2011-06-30 patchlevel 352) [x86_64-linux]
[root@www ~]# mysql --version
mysql Ver 14.14 Distrib 5.1.66, for redhat-linux-gnu (x86_64) using readline 5.1
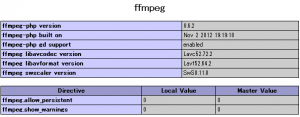
[root@www ~]# ffmpeg -version FFmpeg version 0.6.5, Copyright (c) 2000-2010 the FFmpeg developers
 built on Jan 29 2012 17:52:15 with gcc 4.4.5 20110214 (Red Hat 4.4.5-6)
 configuration: --prefix=/usr --libdir=/usr/lib64 --shlibdir=/usr/lib64 --mandir=/usr/share/man --incdir=/usr/include --disable-avisynth --extra-cflags='-O2 -g -pipe -Wall -Wp,-D_FORTIFY_SOURCE=2 -fexceptions -fstack-protector --param=ssp-buffer-size=4 -m64 -mtune=generic -fPIC' --enable-avfilter --enable-avfilter-lavf --enable-libdc1394 --enable-libdirac --enable-libfaac --enable-libfaad --enable-libfaadbin --enable-libgsm --enable-libmp3lame --enable-libopencore-amrnb --enable-libopencore-amrwb --enable-librtmp --enable-libschroedinger --enable-libspeex --enable-libtheora --enable-libx264 --enable-gpl --enable-nonfree --enable-postproc --enable-pthreads --enable-shared --enable-swscale --enable-vdpau --enable-version3 --enable-x11grab
 libavutil 50.15. 1 / 50.15. 1
 libavcodec 52.72. 2 / 52.72. 2
 libavformat 52.64. 2 / 52.64. 2
 libavdevice 52. 2. 0 / 52. 2. 0
 libavfilter 1.19. 0 / 1.19. 0
 libswscale 0.11. 0 / 0.11. 0
 libpostproc 51. 2. 0 / 51. 2. 0
[root@www ~]# mencoder
MEncoder SVN-r31628-4.4.5 (C) 2000-2010 MPlayer Team
No file given
[root@www ~]# flvtool2
FLVTool2 1.0.6
Copyright (c) 2005-2007 Norman Timmler (inlet media e.K., Hamburg, Germany)
Get the latest version from http://www.inlet-media.de/flvtool2
This program is published under the BSD license.
サーバー要件は満たしているのでダウンロードしてきます。
インストールについてはhttp://menta.orz.hm/wiki/?FFmpegとhttp://menta.orz.hm/wiki/?PHPMotionを参考にしてください。
まずViMP本体のダウンロードから。
こちらよりユーザー登録を行い、メールでアカウントを認証した後、もう一度こちらに飛んでagreementに同意し、 vimp.framework-2.5.9-r20098-community.tar.gzをダウンロードします。(最新バージョンをダウンロード)
sftpなりsambaなりでサーバーにファイルをアップロードしたら作業を開始します。
今回は/var/www/installディレクトリで展開し、/var/www/cms/vimpディレクトリに置きます。
cd /var/www/install
tar zxvf vimp.framework-2.5.9-r20098-community.tar.gz
ls
INSTALL  UPDATE  UPGRADE  apps  cache  config  data  doc  i18n  lib  log  plugins  resources  scripts  symfony  templates  vimp.framework-2.5.9-r20098-community.tar.gz  web
色々出てきてよくわからないので、とりあえずINSTALLを見てみます。
cat INSTALL
1. check if all required software tools are installed
2. create directory for ViMP
3. copy all files into the new ViMP directory
4. create a new virtual host configuration for apache
5. check required php configuration settings
6. create database for VIMP (recommended collation: utf8_unicode_ci)
7. create database user for ViMP and set all required permissions for the ViMP database
8. run ./symfony framework:init mysql://<username>:<password>@localhost/<database>
9. create nessesary cron jobs
FOR A DETAILED DESCRIPTION SEE THE INSTALLATION GUIDE AT http://www.vimp.com/en/getting-started.html.
TO GET FAMILIAR WITH THE FUNCTIONS OF VIMP DOWNLOAD THE ADMINISTRATION GUIDE AT http://www.vimp.com/en/documentation-download.html.
とりあえずデータベース作ってsymfonyを走らせればいいっぽい。
ということでデータベースの作成。
mysql -u root -p
password:
>> create database vimp;
>> exit;
ファイルのコピーとか
mkdir /var/www/cms
mkdir /var/www/cms/vimp
cp -R * /var/www/cms/vimp/
chown -R apache:apache /var/www/cms
コピーが終わったらスクリプトをおいたディレクトリに移動し、symfonyを実行します。
./symfony framework:init mysql://root:password@localhost/vimp
php-xslが入っていないので怒られる。
yum -y install php-xsl
もう一度実行。
./symfony framework:init mysql://root:password@localhost/vimp
Unable to open PDO connection [wrapped: SQLSTATE[28000] [1045] Access denied for user 'root'@'localhost' (using password: YES)]
うーん。ちゃんとインストールガイドを見て見ることに。
http://www.vimp.com/en/documentation-faq-article/items/installing-the-sourceguardian-php-extension.html
ここが参考になりそうなので、このとおりにやってみます。
ただし、インストールするOSが64bitなのでextentionはls /usr/lib64/php/modules/に置きます。
cd /var/www/cms/vimp/data/
tar zxvf loader.tar.gz
cd Linuxx86_64
cp ixed.5.3.lin /usr/lib64/php/modules/
vi /etc/php.ini
最後にextension=ixed.5.3.linを追加
ここまでやって気づいたんですが、PHPMotionの時にすでにixedはロードするようになってました。
よくわからないのでとりあえずインストールフォルダを初期化
rm -rf /var/www/cms/vimp/*
cp -R /var/www/install/* /var/www/cms/vimp/
chown -R apache:apache /var/www/cms/vimp/
そしてもう一度実行。
./symfony framework:init mysql://root:password@localhost/vimp
結構時間がかかりましたがすんなり終了。(PHPに割り当てられたメモリが少ない場合エラーで止まるようです。)
php-xslが入ってないだけでした。
次にcrontabに変換用のシェルを登録しなさいとのことなので、さくっと登録します。
crontab -u apache -e
*/1 * * * * /var/www/cms/vimp/scripts/sync_new_uploads.sh > /dev/null 2>&1
次にapacheの設定に書き込みます。
今回は/cms/vimpで公開するため、Aliasでリンクを貼ります。
Alias /cms/vimp "/var/www/cms/vimp/web"
そしてhttpdを再起動
/etc/init.d/httpd restart
ここまでいけたら多分できてるはずなのでブラウザからアクセスしてみます。
http://hoge.com/cms/vimp/backend.php
id:admin
pass:admin
を入力し、ログインします。
とりあえずadminのパスを変更。
次にサブディレクトリの設定をしようと色々探したんですが、結局見つからない。
PDFに書かれているのは以下の通り。
Installing ViMP into a sub-directory
This section explains how to install ViMP into a sub-directory. We assume that ViMP shall be accessible via http://www.myportal.com/community. We will also assume that the virtual host configuration for Apache2 is already done and that the virtual host points to /var/www/myportal/data.
Normally you’d tend to install ViMP at /var/www/myportal/data/community to make it available under the above URL. But this will not work as http://www.myportal.com/community would point to /var/www/myportal/data/community instead of /var/www/myportal/data/community/web.
So, let’s first create the directory for the installation: mkdir /var/www/myportal/community
ViMP will be installed into a directory that is not accessible by Apache2 directly. You may now continue installing ViMP accordingly to the “Installation” section. We need to change a few more settings after the installation task has completed.
As soon as ViMP is installed, we make it accessible for Apache2. Therefore create a symlink that links the community folder to the web folder of ViMP: cd /var/www/myportal/data mklink –s /var/www/myportal/community/web community
Next, make sure that ViMP knows that it is installed in a sub-directory. Therefore you need to edit the following files:
/var/www/myportal/community/apps/frontend/config/factories.yml
/var/www/myportal/community/apps/webtv/config/factories.yml
/var/www/myportal/community/apps/backend/config/factories.yml
ただし、vimp/apps/frontend/cofig/内で
find ./ -type f -name ‘*.*’ -print | xargs grep relative_url_root /dev/null
を実行しても見当たりません。
ということで起きたらフォーラムで探すってことにして続きはまた明日。
これはPHPMotionより難しいですね。
